I can reflect on my involvement and engagement with the lessons I have learned during the 1st Quarter of Fall 2023 by answering a series of reflective questions so that I can identify my areas of strength and opportunities for growth.
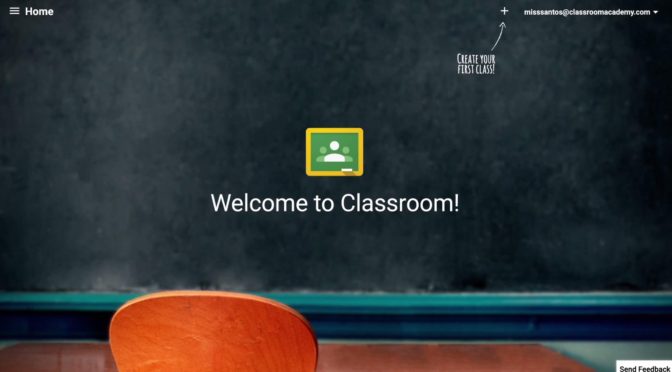
Connect to the Google Classroom site and click on the link to the Google Form at the bottom of the latest post.
Think back from the beginning of the school year to now, and answer the questions provided to reflect on your successes and struggles throughout the first quarter.
You must have at least two complete sentences for each question in each prompt, but use as many sentences as you need to complete your short answer.
Click the Submit button at the bottom of the page to submit your final responses. Do not click any other buttons or navigate away from the page before submitting your answers, or they may be erased. You may even wish to type your answers in a Google Doc or Word Document and then transfer them to the form.
Once you have submitted your form, return to the Google Classroom assignment post, and click the Mark as Done button to mark this assignment as completed and ready for grading.
Your response will be graded on the following criteria: meeting minimum length requirements, clarity, original ideas and mechanics (spelling, grammar and punctuation).
You should consider this a professional post-mortem of a long-form academic experience, and conduct yourself accordingly.
Good luck, and thanks for all your hard work this year! Enjoy your Summer, and consider taking my AP Networking class next year during 4th or 7th period for a chance to earn additional AP credit and a CompTIA Network+ certification!
Assigned: May 19th, 2026 Teacher Pacing Due Date: May 19th, 2026
I can access the online testing platform and test prep platform by logging into the College Board Bluebook website and the CompTIA TestOut website so I can prepare for and take the AP Cybersecurity exam.
Identify common cryptographic flaws and vulnerabilities in various systems.
Explain how specific attacks, such as man-in-the-middle or brute force attacks, exploit these flaws.
Analyze case studies of real-world cryptographic breaches to understand their impact.
Evaluate the effectiveness of different cryptographic algorithms and protocols.
Recommend best practices for securing cryptographic implementations in applications.
Standards:
CompTIA Security+ Objective(s):
3B-NI-04 – Compare ways software developers protect devices and information from unauthorized access.
2.4 Given a scenario, analyze indicators of malicious activity.
Downgrade
Collision
Birthday
Guiding Question:
How does cryptography and encryption protect our daily digital interactions and ensure the security of information?
Resources:
Lesson 2.6.1 – Cryptographic Flaws and Attacks.pptx and Lab 2.6.1 – RSA Key Generation and Secure Shell.pptx presentations and Lab 2.5.1 – Caesar and GPG Activity sheet available on Google Classroom
Assignment:
Read the Lesson 2.5.1 – Daily Application of Cryptography and Encryption.pptxpresentation in today’s class.
Complete the Lab 2.5.1 – Caesar and GPG Activity Form using the Lab 2.5.1 – Caesar and GPG.pptx Powerpoint Presentation posted in the Google Classroom.
Hand in the completed Lab 2.6.1 – RSA Key Generation and Secure Shell Activity Form to complete the lab (50 pts).
Assigned: April 20th, 2026 Teacher Pacing Due Date: April 21st, 2026
Understand the basic concepts of cryptography and encryption.
Identify common uses of encryption in daily life.
Explain the importance of encryption in securing information.
Analyze case studies of encryption in action.
Demonstrate the use of basic encryption tools or methods.
Standards:
CSTA Standard: 3B-NI-04 – Compare ways software developers protect devices and information fromunauthorized access.
Guiding Question:
How does cryptography and encryption protect our daily digital interactions and ensure the security of information?
Resources:
Lesson 2.5.1 – Daily Application of Cryptography and Encryption.pptx and Lab 2.5.1 – Caesar and GPG.pptx presentations and Lab 2.5.1 – Caesar and GPG Activity sheet available on Google Classroom
Assignment:
Read the Lesson 2.5.1 – Daily Application of Cryptography and Encryption.pptxpresentation in today’s class.
Complete the Lab 2.5.1 – Caesar and GPG Activity Form using the Lab 2.5.1 – Caesar and GPG.pptx Powerpoint Presentation posted in the Google Classroom.
Hand in the completed Lab 2.5.1 – Caesar and GPG Activity Form to complete the lab (50 pts).
Assigned: April 16th, 2026 Teacher Pacing Due Date: April 17th, 2026
Be able to explain the fundamental concepts of hashing and its historical development in computer science.
Identify and compare various hash functions, including MD5, SHA-1, SHA-2, and SHA-3, along with their applications and vulnerabilities.
Discuss the role of hashing in data integrity, security, and modern technologies such as blockchain.
Evaluate the implications of current challenges in hashing and consider future trends in cryptography, especially in the context of quantum computing.
Standards:
CompTIA Security+ SYO-701 Objective:
1.4 – Explain the importance of using appropriate cryptographic solutions
Hashing
Salting
Guiding Question:
What are the different types of encryption?
Resources:
Lesson 2.3.1 – Hashing Past and Present.pptx and Lab 2.3.1 – Hashing.pptx presentations and Lab 2.3.1 – Hashing Activity sheet available on Google Classroom
Assignment:
Read the Lesson 2.3.1 – Hashing Past and Present.pptxpresentation in today’s class.
Complete the Lab 2.3.1 – HashingActivity Form using the Lab 2.3.1 – Hashing.pptx Powerpoint Presentation posted in the Google Classroom.
Hand in the completed Lab 2.3.1 – Hashing Activity Form to complete the lab (50 pts).
Assigned: April 15th, 2026 Teacher Pacing Due Date: April 16th, 2026
Be able to distinguish between block and stream ciphers.
Explain how block and stream ciphers operate.
Be able to provide examples of where these ciphers would be used.
Standards:
CompTIA Security+ SYO-701 Objective:
1.4 – Explain the importance of using appropriate cryptographic solutions
Guiding Question:
How are ciphers categorized in today’s usage and how are they used for the protection of data?
Resources:
Lesson 2.2.1 – Cipher Types and Early Examples.pptx and Lab 2.2.1 – Encrypting with ChaCha20 and AES.pptx presentations and Lab 2.2.1 – Encrypting with ChaCha20 and AES form available on Google Classroom
Assignment:
Read the Lesson 2.2.1 – Cipher Types and Usage.pptxpresentation in today’s class.
Complete the Lab 2.2.1 – Encrypting with ChaCha20 and AES Activity form using the Lab 2.2.1 – Encrypting with ChaCha20 and AES.pptx Powerpoint Presentation posted in the Google Classroom.
Assigned: April 13th, 2026 Teacher Pacing Due Date: April 14th, 2026